Hi, Everyone,
It’s Technique Tuesday!
Tim Holtz has challenged everyone to use the Sizzix Alterations
Tattered Florals Die to create an original piece of Art. So, being up to the challenge, I decided to show you how to make Roses out of
Ten Second Studio Foil Sheets. We will be creating a vintage card showcasing our beautiful Foil Roses and featuring Prima’s
Sunrise Sunset paper designed by Finnabair along with a sampling of Prima’s
Tiny Junkyard Findings.

Let’s begin.

On the
Tattered Florals Die there are 4 individual flower shapes on the die. I chose to use the 2
nd largest flower only.

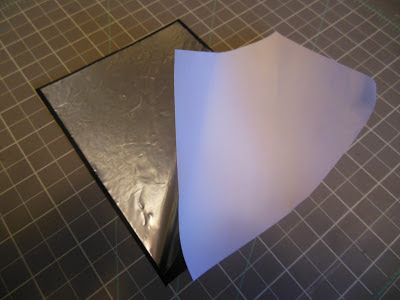
First, I cut the Foil Sheet into 2” squares using a paper trimmer. The Foil Sheets cut like butter. You can cut 20 flowers from one 8 ½ x 11” Foil Sheet.

I then embossed the Flowers with the Sizzix Alterations
Dot Matrix Embossing Folder to give the petals a dot texture.

Next, I crumpled a 2” square Foil Sheet, straightened it out, then gently sanded the edges and the surface with an Idea-ology sanding block highlighting the wrinkles.

I then gently sanded the surface of the flower petals to reveal some of the silver foil. This creates a wonderful worn texture to the pieces.

Now to make the Roses, we cut apart the flower petals to create pieces having 1 petal, 2 petals, 3 petals, 4 petals, and 5 petals.

Starting with a 1 petal piece and using tweezers, curl the petal in on itself at the point creating a cone. Repeat this process with the 2 petal, 3 petal, 4 petal, and 5 petal pieces then gently curl the tips of the petals outwards with your finders.

Next, we stack the cones into each other creating the Rose. Dip the pointy end of the 1 petal cone into Fabri-tac and stack it inside the 2 petal cone.

Then we dip the pointy end of the 2 petal cone into Fabri-tac and stack it inside the 3 petal cone.

Then we dip the pointy end of the 3 petal cone into Fabri-tac and stack it inside the 4 petal cone.

Then we dip the pointy end of the 4 petal cone into Fabri-tac and stack it inside the 5 petal cone.

We have now created a 5 cone Rose.

To create the vintage card we will need a 5 cone Rose, a 4 cone Rose, and a 3 cone Rose.

To go with our beautiful Foil Roses I’ve pulled Prima’s new
Sunrise Sunset paper designed by Finnabair along with some of Prima’s
Tiny Junkyard Findings.

This is what the card looks like all put together!
Stop by and check out the
Ten Second Studio Foil Sheets, Prima’s new papers and
Tiny Junkyard Findings the next time you are at
Treasured Memories.
Have fun creating!


