It’s Technique Tuesday!
Today I would like to show you the “Enamelled Foil Panel” technique to create a manly card featuring a vintage photo in an Enamelled Foil Panel. The Foil Panels can be created using Ranger Foil Tape Sheets and Adirondack Acrylic Paint Dabbers which are sold at Treasured Memories.
Let’s begin.
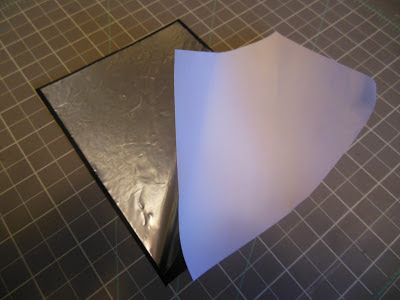
Peel the backing off the Foil Tape Sheet and attach it to a piece of black cardstock
(creating a Foil Panel).
Emboss the Foil Panel through a Tim Holtz Alterations Embossing Folder
to create this beautiful design.
Then
, we sand away most of the paint from the raised embossed areas and the edges
using a Tim Holtz Idea-ology sanding block, exposing the foil for ink.
Next,
ink over the entire Foil Panel with Walnut Distress Ink using an ink blending tool.
Heat set with a heat tool.
Now to get the "Enamelled" part of our Foil Panel,
we pat Embossing Ink over the inked foil then sprinkle
Clear Embossing Powder
& melt the embossing powder with a heat tool. Allow the foil to cool.
Stop by and check out the Ranger Foil Tape Sheets, Tim Holtz Idea-ology Sanding Block, and Adirondack Acrylic Paint Dabbers the next time you are at the store.
Have fun creating!


Hi Kathleen!
ReplyDeleteLove, Love, LOVE the enameled foil!
Wanted to let you know how much your blog inspires me and that I have nominated you for a Liebster Award.
http://foronemoment.blogspot.com/2013/03/liebster-blog-award.html
Wow, thanks Anna! I love to create & inspire others. My heart swells with pride when ladies tell me how I encourage them or when they come into Treasured Memories to show me what they created from my posts or spin-offs from my classes. Thank you for following my blog & have fun creating!
DeleteKathleen
Love this! Have long been intrigued with creating enamel & cloisonne effect on foil, so this is right up my creative alley. Beautifully done!
ReplyDeleteThe sticky-back foil is easy to work with and embossing folders really add wonderful texture. Once you sand it. . . wow, it really looks great. Have fun creating!
DeleteI love that technique. Thank you so much for sharing the step by step. I have to try it.
ReplyDeleteIt was really fun to do and I love how nostalgic it looks.
DeleteThanks for stopping by!